- Savage Blog
- How to Mount a Scope - Step by Step Guide
How to Mount a Scope - Step by Step Guide

To get the most accuracy out of your scope and firearm, a properly mounted optic is critical. We’ll take the guesswork out of this process and take you through a step-by-step guide on how to mount a scope on your firearm.
Before you get started – make sure your firearm is unloaded, clear of ammunition and the safety is on.
What You Need To Get Started
- Rifle
- Scope
- Bases
- Rings
- Thread locker
- Cleaning cloth
- Isopropyl alcohol
- Torque screwdriver
- Work area with something to securely hold the rifle, like a shooting rest
**Be sure no ammunition is present.**
A good mounting job starts with the right mounting accessories – rings and bases. Before you begin, make sure that your rings and bases are compatible with each other, the rifle and optic. Check the size of your screw holes as well. Many receivers are drilled and tapped for 6-48 screws (including all rimfire rifles), but some are drilled and tapped for 8-40 screws. There’s nothing more frustrating than realizing you don’t have the correct mounting pieces (not speaking from personal experiences or anything).
If you need help, check out this guide on how to find what bases you need for your centerfire rifle.
It's best practice to mount the scope as close to the barrel as possible. Contact the scope and mount manufacturers on ring height recommendations if you're unsure what you need.
Steps
Installing the Scope Base
We recommend "dry fitting" the bases and rings with the scope before applying any thread locker or torque. The orientation of the bases or rings may need to be moved to ensure proper eye relief and fit, so it's best to know where your pieces need to be before they are torqued properly. Some shooters prefer to snug down the scope base screws, install the scope rings and position the scope before come back to thread lock the base.
- Use a cleaning cloth to ensure all surfaces of the receiver, bases, rings, and optic are clean. Use a de-greaser or isopropyl alcohol to remove grease, oil, dirt and debris.
- Check that the screw holes on the base align with the holes in the receiver. If you're using a two-piece base, one base may overhang the ejection port. This is common in Axis and long action 110 models.
- Apply a small amount of thread locker onto the scope base screws.
- If the base has two different lengths of screws, make sure you have them placed in the correct positions (longer screws go in the rear, shorter screws go in the front).
- Use a torque wrench to tighten the base screws into the receiver. Follow the base manufacturer's recommendation for torque specs. Alternate between the front and back screws to distribute the force. Make sure you’re using the proper screwdriver tip. Scope mounting screws are notoriously easy to mar up.

Installing Scope Rings and Positioning the Scope
- Loosely mount the rings on the base, tighten screws just enough to hold everything in place.
- Remove the top halves of the rings (we recommend keeping them in sets).
- Place your scope in the bottom halves of the rings.
- Replace the top halves of the rings and loosely tighten the screws – again, snug enough to hold everything in place for right now. This is so you can adjust the optic’s position for proper eye relief
- With the optic on the lowest power setting, shoulder the rifle (pointed in a safe direction) and look through the optic.
- Move the optic forward or rearward until you have a full sight picture through the optic. You don’t want to see a dark ring around the edges.
- Check the sight picture with the optic on the highest power setting
- Once the optic is positioned properly, mark the tube in some way so you have a reference of its position when you come back to tighten the screws.
- Use a leveling tool on the receiver to make sure the firearm is level with the ground for mounting
- Level the scope. You can use the "old reliable method" by hanging a plumb bob or a weight on a string across the room. Look at the string through the optic and adjust the scope to ensure the reticle is plumb. Most scope mounting kits have several levels to help you do this.

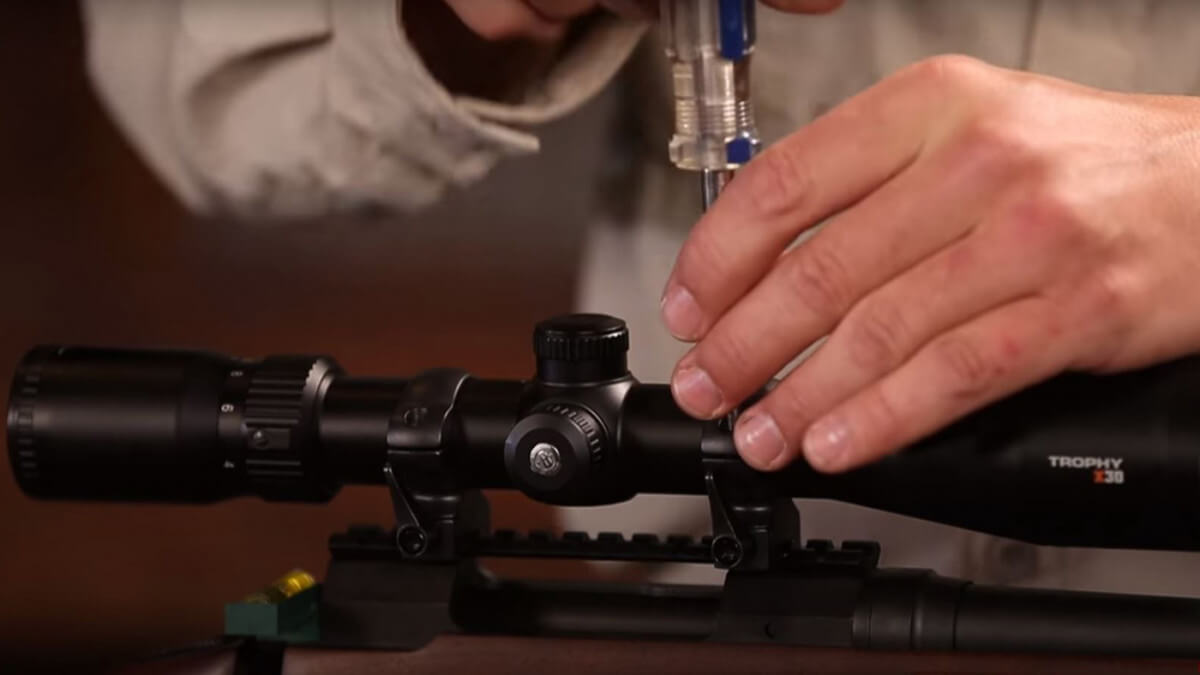
Tightening Screws
Now you can start tightening the screws! Since you have already positioned the scope for good eye relief and level reticle, we recommend only working on one ring at a time.
- Remove the top half of one ring.
- Apply a small amount of thread locker to the screws.
- Snug down the ring screws in an alternating pattern.
- Repeat this process with the other ring.
- Once all the screws are snugged down on both rings, it’s time to final tighten with a torque screwdriver. Check the ring manufacturer's recommendation for torque specs. Typically, 15-20 inch pounds is sufficient, but it can vary based on design. It’s important to not over-tighten the screws – this can cause damage to the optic.
Now that your optic is mounted, it's time to boresight it!
