- Savage Blog
- How to Takedown the Savage REVEL
How to Takedown the Savage REVEL

The brand-new Savage REVEL is a throwback to classic lever action rifles you know and love with a few modern twists. The biggest twist with the new REVEL is its quick takedown feature, allowing the rifle to be disassembled and stowed away quickly for easy transportation and cleaning. In this blog we’ll go through a quick rundown of how to takedown the Savage REVEL so you can get out plinking and hunting with your new rimfire rifle!
WARNING! Always keep the muzzle pointed in a safe direction. Make sure your firearm is completely unloaded and ensure that your workspace is void of ammunition at all times. The safety should be set to the Full Safe position. Safety glasses should be worn.
Models
How to Takedown the Savage REVEL
Open the action and work the lever multiple times to ensure no ammunition is in the magazine tube
Visually and manually inspect the action to verify there is no ammunition present in the chamber or magazine
Close the action
Place the manual safety into the FULL SAFE position. Be sure to keep the lever open and manual safety in the FULL SAFE position during disassembly and reassembly.
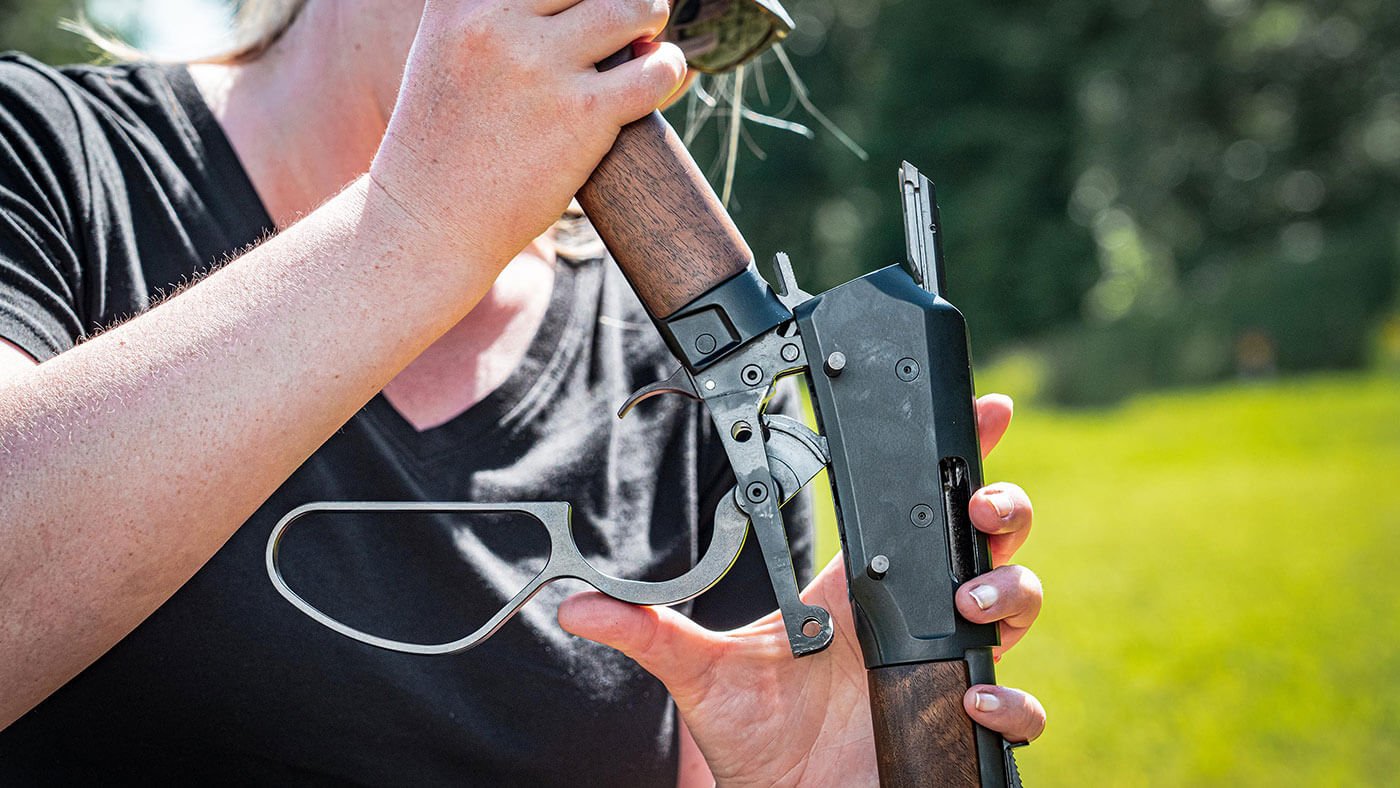
With the lever fully open, locate and press in on the two takedown pins on the cover to the right until they come out as far as they will go. The takedown pins are captive and cannot be fully removed.
Pull the lower and upper halves in opposite directions
How to Reassemble the Savage REVEL
To reattach the two halves together, first ensure that the manual safety is still in the FULL SAFE position and hat the hammer is in the FULLY COCKED position. The lever must be in the full open position.
Ensure that the bolt is protruding out of the rear of the upper half assembly to the hammer cut out.
With the lever in the open position, take the lower half assembly and slide it inside the upper half assembly, paying close attention to the bolt and lever assembly alignment.
Once the takedown holes align, press in the takedown pins back into the cover assembly. They need to be flush on both sides to be fully seated.
Ensure that there is no ammunition in the firearm. To ensure proper functionality, move the manual safety to the READY TO FIRE position. Keeping your fingers and other objects away from the trigger, place all of your fingers inside the finger loop. Operate the finger lever open and closed several times to ensure free movement of all parts. If something does not operate correctly or binds, go back to step 1 and start over.
Safe firearm ownership is your responsibility. When something does not sound, feel, or look right, seek the advice of a professional gunsmith immediately.
If you have any questions, please refer to your owner’s manual and call our customer service team at 1-800-370-0708 (Monday-Friday, 8am-5pm ET)

